Using Diffuser Jewellery
What are the 5 Benefits Of Using Diffuser Jewellery
1. NEVER LEAVE HOME WITHOUT IT.
Do you have a favorite essential oil that relieves your stress or uplifts your mood? Bring it with you while you work, travel, or drive your kids around for an instant pick me up anytime you need it. Life can be stressful, so rock your diffuser bracelet or necklace and reap the calming benefits all day long.
2. LONG-LASTING AROMATIC GOODNESS.
You could apply essential oils directly to your skin, but the scent would be fleeting as the oil is quickly absorbed. With diffuser jewelry, a drop or two of oil will maintain its scent for at least a day, if not longer.
3. KISS YOUR TOXIC PERFUME GOODBYE.
Synthetic fragrances are loaded with harmful chemicals that the manufacturers are not required to disclose. Trade in your Chanel No. 5 for diffuser jewelry paired with fresh oils such as jasmine, rose, or lavender. You’ll protect your health, save a lot of money, and smell much better.
4. THE MOST BANG FOR YOUR BUCK.
Diffuser jewelry requires minimal oil compared to traditional diffusers, making your oil last as long as possible. You only need a drop or less per day, so you’ll spend less money on oils over time.
5. FUNCTIONALITY MEETS FASHION.
Not only is diffuser jewelry good for your health, but it’s also a unique and stylish everyday accessory you’ll love to show off. Lava stone diffuser bracelets come in a variety of styles, often mixed with beautiful charms or stones with their own healing properties, such as turquoise or white howlite. Or you can make it from air dry clay and make it as funky as you like!
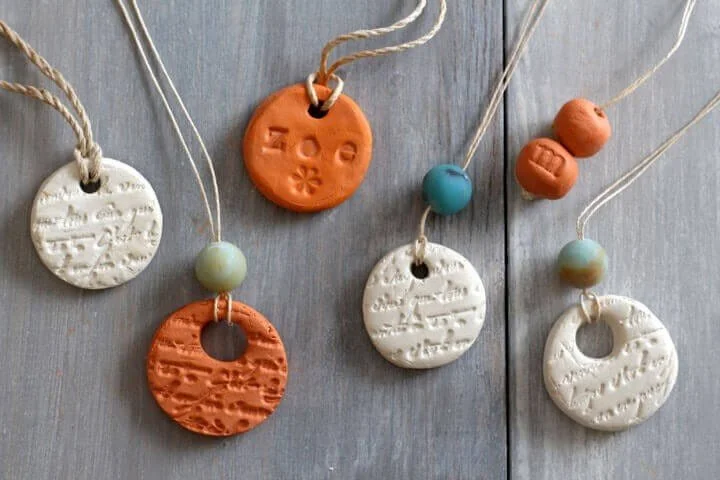
HOW TO MAKE AN ESSENTIAL OIL DIFFUSER NECKLACE
Air dry clay in the color of your choice –
Lid, cap or cookie cutter in the size and shape you want your pendant to be
Straw or pen cap
Cording
Wax paper
Decorative beads (Optional)
Stamp (Optional)
Fine grit sandpaper (Optional)
On a surface covered with wax paper, roll out your clay until it is about 1/4 inch thick.
Press lid, cap or cookie cutter into the clay to create your pendant shape.
Now add the hole that you will string your pendant with.
If you’re using a stamp to add design, now is the time to press it into the clay.
Peel away the clay from your pendant and allow it to dry for 1-2 days.
When the pendant is dry, lightly sand away any rough edges.
Now it’s time to string your pendant.
Decide what length you want it to be since it doesn’t have a clasp you’ll want to make sure it will fit over your head.
After you trim the amount of cord you’ll need, fold it in half and slip the middle of the cord through the back of the hole in the pendant to the front.
You now have a loop.
Then take the tail of the cord and slide it through the loop. Tighten as needed.
If desired, add a bead for decoration.
Now add your oils and enjoy!

Want to do some more DIY goodies, grab our Gift of Homemade Book.
Hugs Nic